The SDLC process is a core part of having a well governed Power BI environment. Let’s take a look at Setting up Power BI Deployment Pipelines and Parameters
Side Note: Want to learn SQL or Python for free. In less then 10 minutes a day and less than an hour total? Signup for my free classes delivered daily right to your email inbox for free!

Now back to the article…
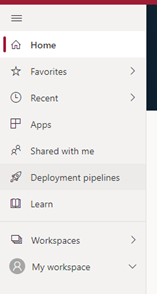
- Navigate to app.powerbi.com and select the “Deployment Pipelines” in the menu
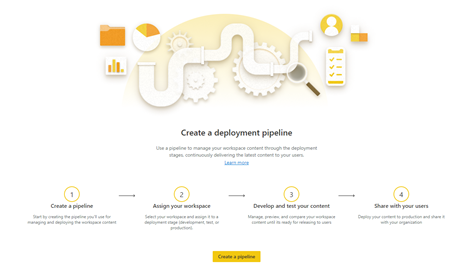
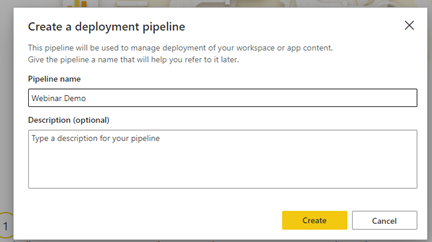
- Select “Create a pipeline”
- Give the pipeline a name. For best practices, it is suggested you use the name of the Workspace you will be creating the Pipeline for.
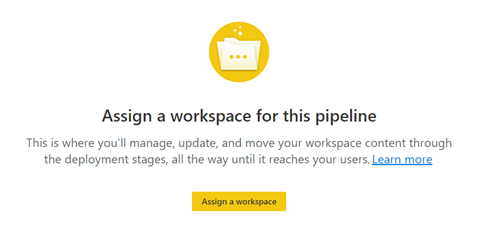
- With the workspace created the first thing to do is Assign the pipeline to a workspace. Pipelines can only be assigned a single workspace and workspaces only tied to one pipeline. If you create another pipeline, that workspace will not be selectable.
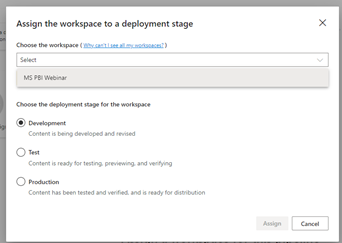
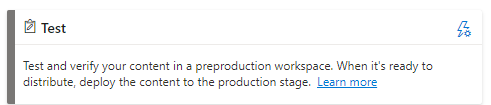
- Select the workspace you will be creating a pipeline for. You will also be asked to select what stage of the pipleline this represents. This is usually set to development as you will want to deploy to Test and Production as part of your SDLC (Software Development Life Cycle)
- Completing this step will create 2 new workspaces in your Power BI environment as you deploy called Workspace_Name [Test] and Workspace_Name [Production]
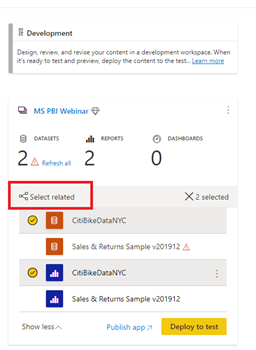
- In the Pipleine window, under the development section you can expand the window to see all the elements in that workspace. By selecting the items at the bottom, you can pick which items you wish to move to Test.
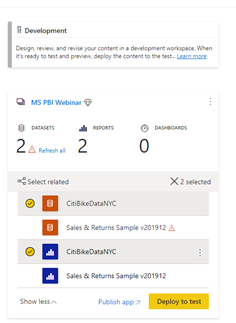
- The “Select Related” button will also work to pick out all related items incase you are missing an dependent item that needs to be deployed.
- Once you deploy to test, and deploy to production, the Pipline will create the new work spaces and move the items across.
- The Indiciator on the arrows that connect the pipelines will show if the there is a discrepancy between the environment.

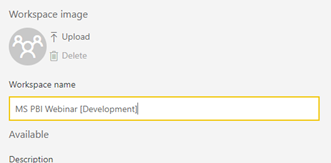
- It is best practice to rename the development workspace so that the naming convention is easy to follow.
- You can change the dataset rules for each environment and set parameters by clicking on the Lightning bolt. This is handy for setting up test and production data sources for each environment.

- To Parameterize your Power BI Data source Connections, open a Power BI report and go to Transform Data and the “View” tab.
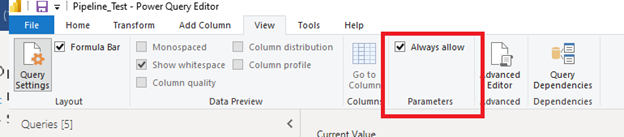
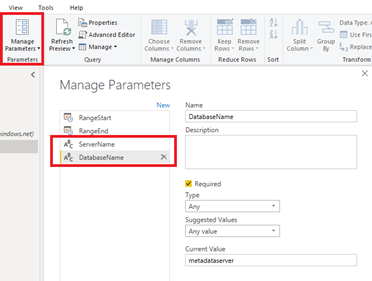
- Under parameters, set the checkbox to “Always Allow”. This will enable you to use parameters in your data source connections.
- You can now setup two parameters for the server name and the database name
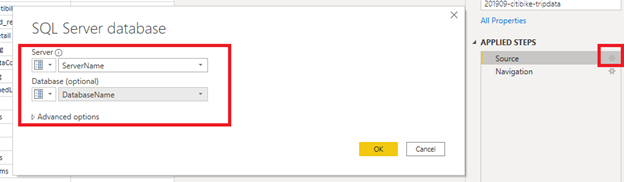
- Edit your source to now use those parameters in the Power BI report so they can be modified in the Pipeline deployments.
Setting up Power BI Deployment Pipelines and Parameters